


Before you activate a routing plan, we recommend testing out the plan. You can use the alternate routing plan to test if a routing plan works as intended without disturbing the settings in the other two plans. With a routing plan, you can be assured your disaster recovery plan is ready for activation when you need it.
The following features give you the ability to reroute the inbound traffic to your contact center:
- Voice Services Channel Rerouting: Allows you to divert the contact center's inbound telephony traffic to the companion tenant or alternate phone numbers. This feature is available to both VO-VCC and Virtual Contact Center users with dedicated public numbers.
- VCC Agent Login and Direct Dial Rerouting: Allows you to divert calls for agents with private channel numbers to the companion tenant or an alternate phone number in case of emergency. During a disaster event, the agents log in to their application URL like before, but the system diverts them to the disaster recovery site as configured by the Account Manager administrator prior to the disaster. This feature is only available to VO-VCC users.
We recommend the following workflow for setting up Channel and VCC Agent Login and Direct Dial Rerouting:
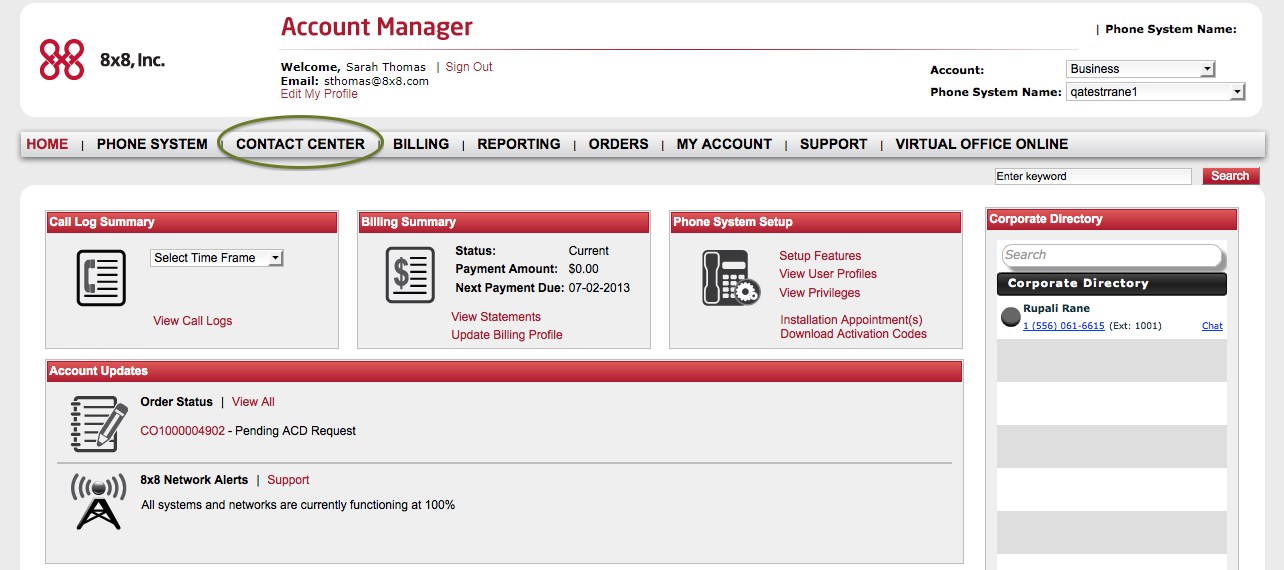
- Log in to Account Manager by going to http://login.8x8.com from your preferred browser.
- Click Contact Center in the top navigation bar.
- From the Contact Center menu, select one of the following: The following table shows the fields and options available in Virtual Contact Center:
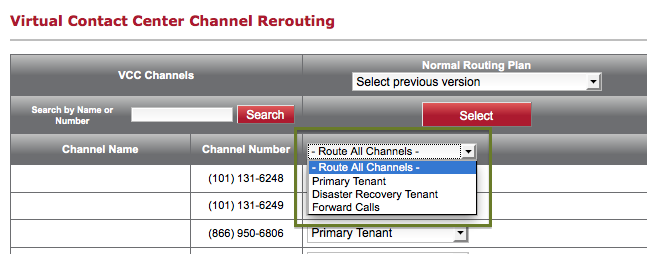
Field Description User ID The agent user ID used to log in to the Agent Console. Last, First The last and first name used for the account. Ext The dedicated or virtual extension number assigned to the agent. Calling Name Name displayed on PSTN calls, which contains the first 15 characters from the agent's first and last name. Channel Name The name of the channel that you are planning to reroute. Channel Number The telephone number of the channel that receives the incoming calls. VCC Channels All Virtual Contact Center channels are listed. You can select all channels or only the ones you like to reroute. Route all Channels If selected, the system reroutes all Virtual Contact Center channels. Primary Tenant Forwards all traffic to the channels that come to the primary tenant. Forward Calls Forwards inbound traffic to a specified phone number. Normal Routing Plan Indicates the plan for call routing during normal business operation. Alternate Routing Plan Allows you to test the set up channel rerouting, validate routing options, and copy the validated plan to the normal or disaster plan. Disaster Routing Plan Indicates the plan for call routing during a disaster. - Voice Services Channel Rerouting: View and set up the Virtual Contact Center channel routing plans.

- VCC Agent Login and Direct Dial Rerouting: View and set up agent login and routing plans.
- Voice Services Channel Rerouting: View and set up the Virtual Contact Center channel routing plans.
- From the Contact Center menu, select one of the following: The following table shows the fields and options available in Virtual Contact Center:
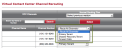
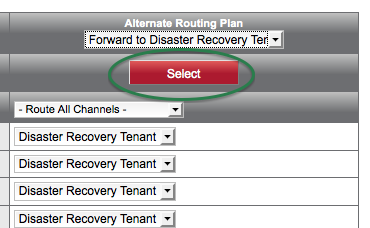
- Select a channel and specify a routing option under the Alternate Routing Plan from the available choices:
- Primary Tenant: forwards all traffic to the channels in the primary tenant.
- Disaster Recovery Tenant: forwards all traffic to the dedicated DR tenant.
Note: DR Tenant is limited to tenants with the 8x8 Disaster Recovery Service.
- Forward Calls: forwards inbound traffic to a specified phone number. Enter a valid phone number.
- Alternatively, you can route all channels to the same destination by selecting an option from the Route All Channels drop-down menu.
- Click Save Changes. You are prompted to save with comments.
- Enter a brief note to indicate the changes you made.
Saving takes a snapshot of the settings in the Alternate Routing Plan column.


Changes to your routing plan take effect upon activating the plan. To activate a routing plan, click Select under a plan. The call redirection takes effect immediately. The ability to automatically store and retrieve previous versions of plans provides the flexibility to revert to a previous plan any time.
- Click Select to activate the alternate routing plan.

- Test if the calls are routed as intended.
- When the selected plan operates successfully, you are now ready to copy the plan to the Normal Routing Plan or the Disaster Routing Plan.
- From the drop-down menu under Disaster Routing Plan or Normal Routing Plan, select the Alternate Routing Plan you just validated.
- Refer to the comments to make sure you are copying the right version.
- The copy action highlights the channels with changed settings.
Note: You can access up to five previously-saved versions of a routing plan. You have the flexibility to revert to these plans, should the need arise.
- Click Save Changes.
Note: When you save changes to a routing plan, a snapshot of the plan is saved as a new version for that plan. You can access up to five previously-saved versions for each plan. Saving changes across all three plans provides a separate version for each plan. Each of these versions reflects a snapshot of the plan itself. This way, you can copy the settings from a column by selecting the desired version specific to the plan.
For more information, click here.
...